
DIY Custom Triangle Wall Wallpaper…without the paper, or the cost.
Don’t you just love when everyone bombards you at once with “Mommy… I’m booooored”(yes…that lovely drill…) The idea must have been lurking somewhere in the back of my mind, because before they can say another word I’m like “You know what? How would you like to paint the playroom wall?”…”HOORAY”…and off to Home Depot we went.
Six ruined outfits, a paint tornado and two weeks later, I am so IN LOVE with how our playroom triangle wall came out that I get excited literally every time I see it!
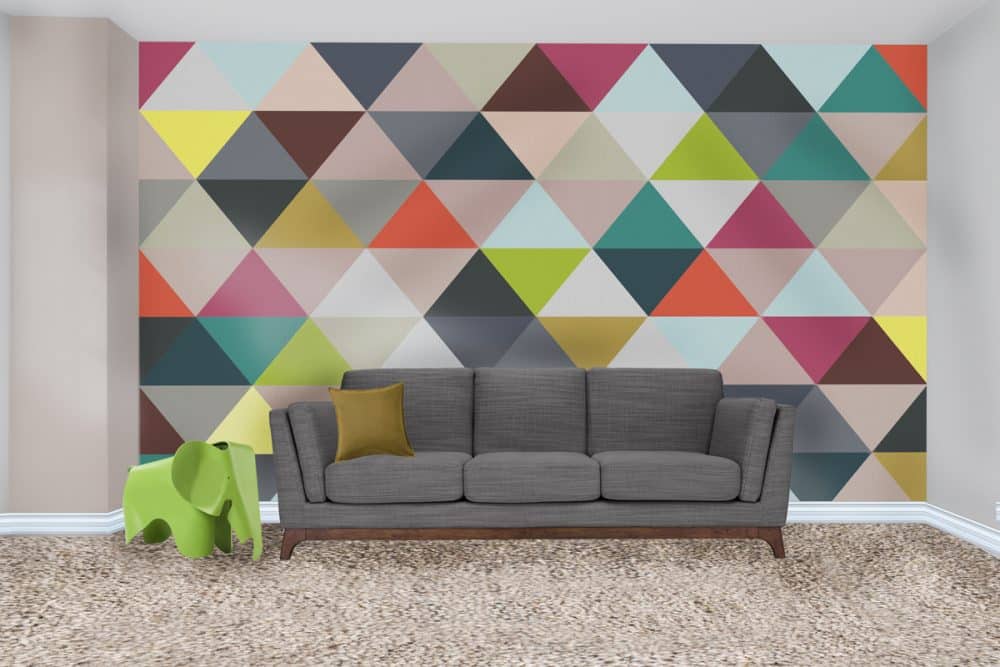 So great right?!! Here is the best part. The entire project cost $80.00 (compared to the $700 inspiration wallpaper I was eyeing) and kept us (yes, everyone helped!) busy for two weeks! If you have that DIY in you, want to add some color and fun to a room, and are in the mood of living in a paint wreck zone for a week or so, this project is PERFECT!
Here is what you need:
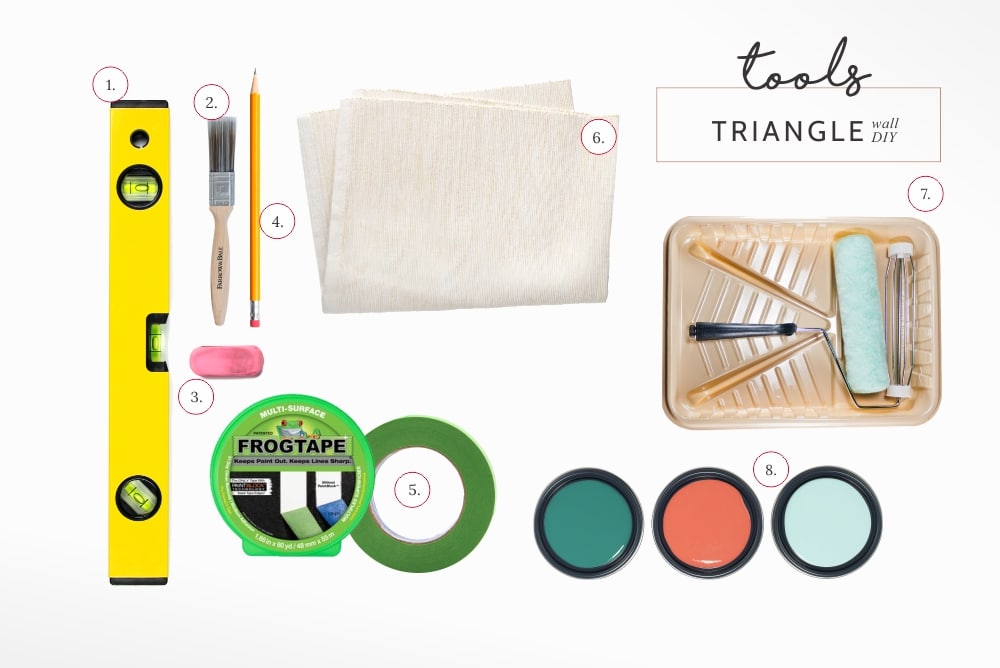
level; small paintbrush; eraser; pencil; frog tape; canvas drop; roller kit; paint
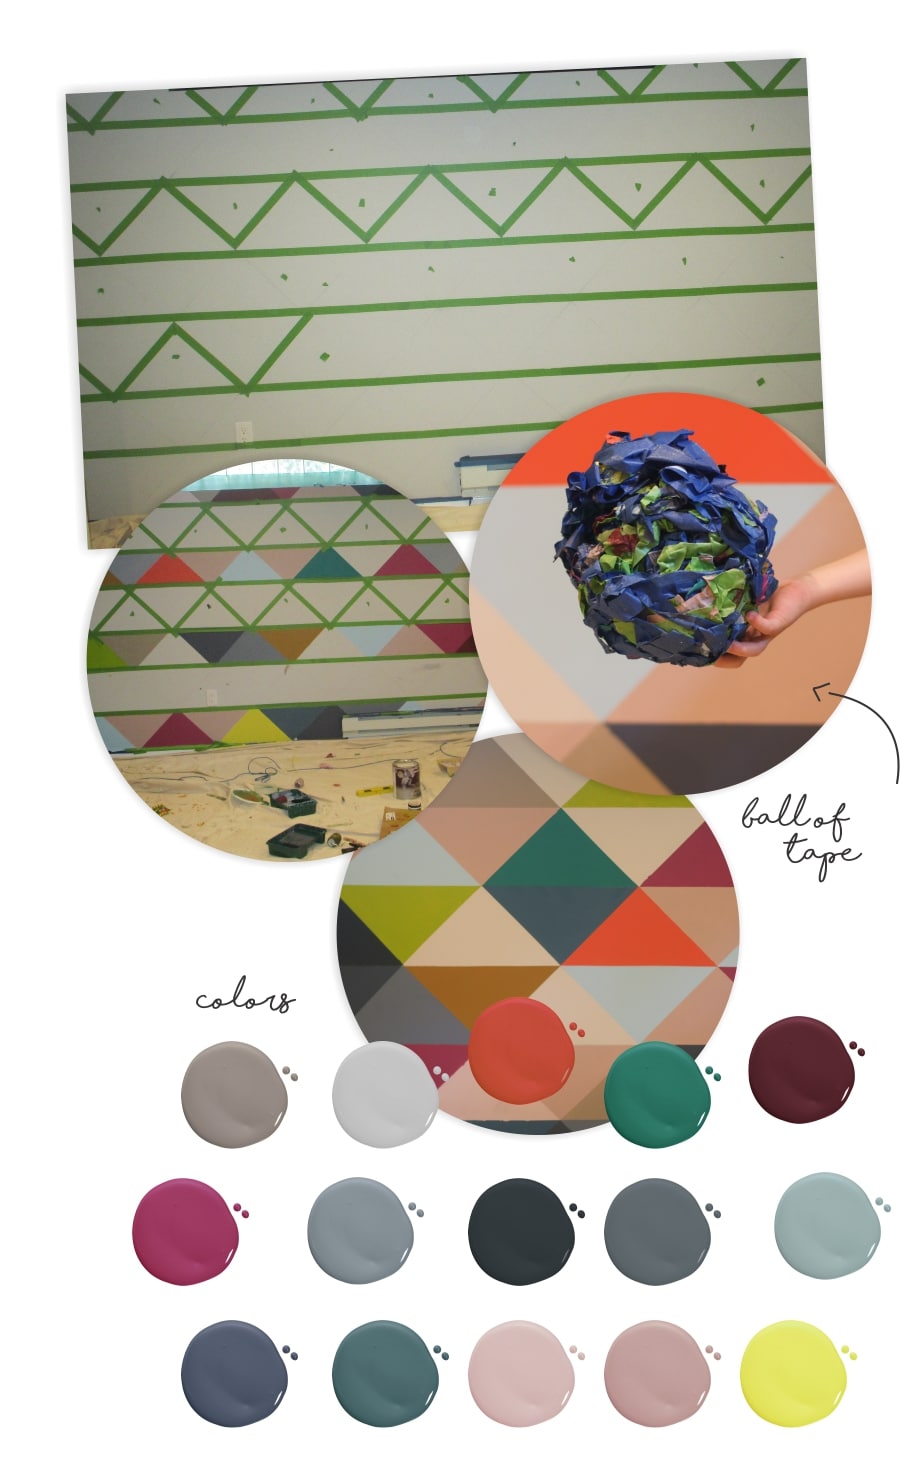
The hardest part comes first. The prep. Start by drawing your horizontal lines with a pencil. Don’t forget to use a level. My lines are 12” apart. When you are doing a project like this start at the ceiling and work your way down, that way you will end up with a full design at the top and the broken design at the bottom.


The taping and painting process is kind of tedious but the end result is worth it. I used the method used in this video (mute the volume – so you can concentrate) as a guide.
So what do you think? Is this project something you can handle?
This is amazing!! I’m so proud of my talented daughter!!! I even like the animated sample she made! she never ceases to amaze me!! Love you,
This looks amazing! Would love to try this…. what am I getting myself into??
❤️️
It looks gorgeous… Did you prime your walls before?
How many coats of paint did you use?
How long did you wait before removing the tape?
Thanks!
Hi Malka,
• The walls were in good shape and painted with a light color paint so I didn’t need to prime it.
• I did one coat of paint for each triangle, however one or two colors were thinner than the rest and needed a second coat. (I was only able to tell once it dried.)
• We waited overnight before removing the tape.
Hope this helps!
Hi why doesn’t the tape leave a visible blank space wherever you taped on the wall?
Wondering that too…
In order to avoid a white space between the triangles – you alternate painting the triangles in each row. For example: On row 1, you would only tape and paint triangles 1, 3, 5 etc. in one round, and when that dries you would remove the tape and then tape & paint triangles 2, 4, 6 etc.
Because you are alternating – the tape being placed is not between the triangles – instead it is placed OUTSIDE of the triangles being painted in that round. (and inside the ones that are not being painted.)
It is a bit tricky. Hope this explains it somewhat.
I added a video link and some photos to explain the process better. Good Luck!
Thank you for the awesome tutorial, love how ours turned out! 🙂
https://lollyjane.com/painted-accent-wall/
Love how the nursery turned out! Thanks for sharing.
Did you plan where to paint which colors or just wing it?
I actually did do a quick color mock-up in illustrator, and worked off that for the most part. Towards the end we just judged with our eyes and filled in the empty spots with the colors that weren’t used as much.
Would you mind sharing which colors you used for your wall? Also, how many gallons of each color paint did you purchase?
I too am wondering this for the accent colors. They’re stunning! It will depend on your wall size as well, so if you can give us a rough estimate of wall size or # of triangles, that will help. Thank you so much for the tutorial!!
I wish i had kept the color numbers. I do not have them. When i originally purchased them I just walked into Home Depot and visually matched them up to my inspiration images.
As for gallon amount, i purchased sample size 8oz jars, the are cheap and there was more than enough.
The size of my wall is 8ft tall x 15ft wide. Each triangle measures 23″ wide at the base. 12″ in height from the center and two side diagonal lines measure 16″ each. I updated the photo above to illustrate this.
Hope this helps.
The wall is beautiful! Would you have the names of each colour you used and the brand?
I wish i wouldve saved the colors. I dont have them 🙁
The brand of paint was Behr from Home Depot. I used a matte finish.
Thanks for tips. Just finished the wall in my den!
https://imgur.com/a/dEI0WUw
Do you know which grey is on the other walls?