
With a bit of practice, your child can have neat, easy to read handwriting when you help him or her master these simple rules.
Often all a poor handwriting really needs is a few simple tweaks. A more legible, clearer handwriting can help your child succeed academically and build up his or her confidence!
Practice these 3 simple handwriting techniques using triple lined paper (you can download and print a pdf version here).
Step 1: Sizing
This step focuses on the lowercase letters.
Initially use triple lined paper and then graduate to looseleaf paper.
Have your child write a sentence. Check to see that the lowercase letters are in the correct categories- “tall,” “small” or “under the line.”
“Tall” lowercase letters are letters b, h, d, k, l, etc. because they begin at the top line and reach all the way to the bottom line.
“Small” lowercase letters are letters a, c, e, n, w, etc. because they start at the middle line, not the top line.
“Under the line” letters are lowercase letters y, g, j, p, etc. that begin at the middle line and go under the bottom line.
How to practice sizing (see images below):
Explain to your child that some lowercase letters are tall, some are short and some go under the line.
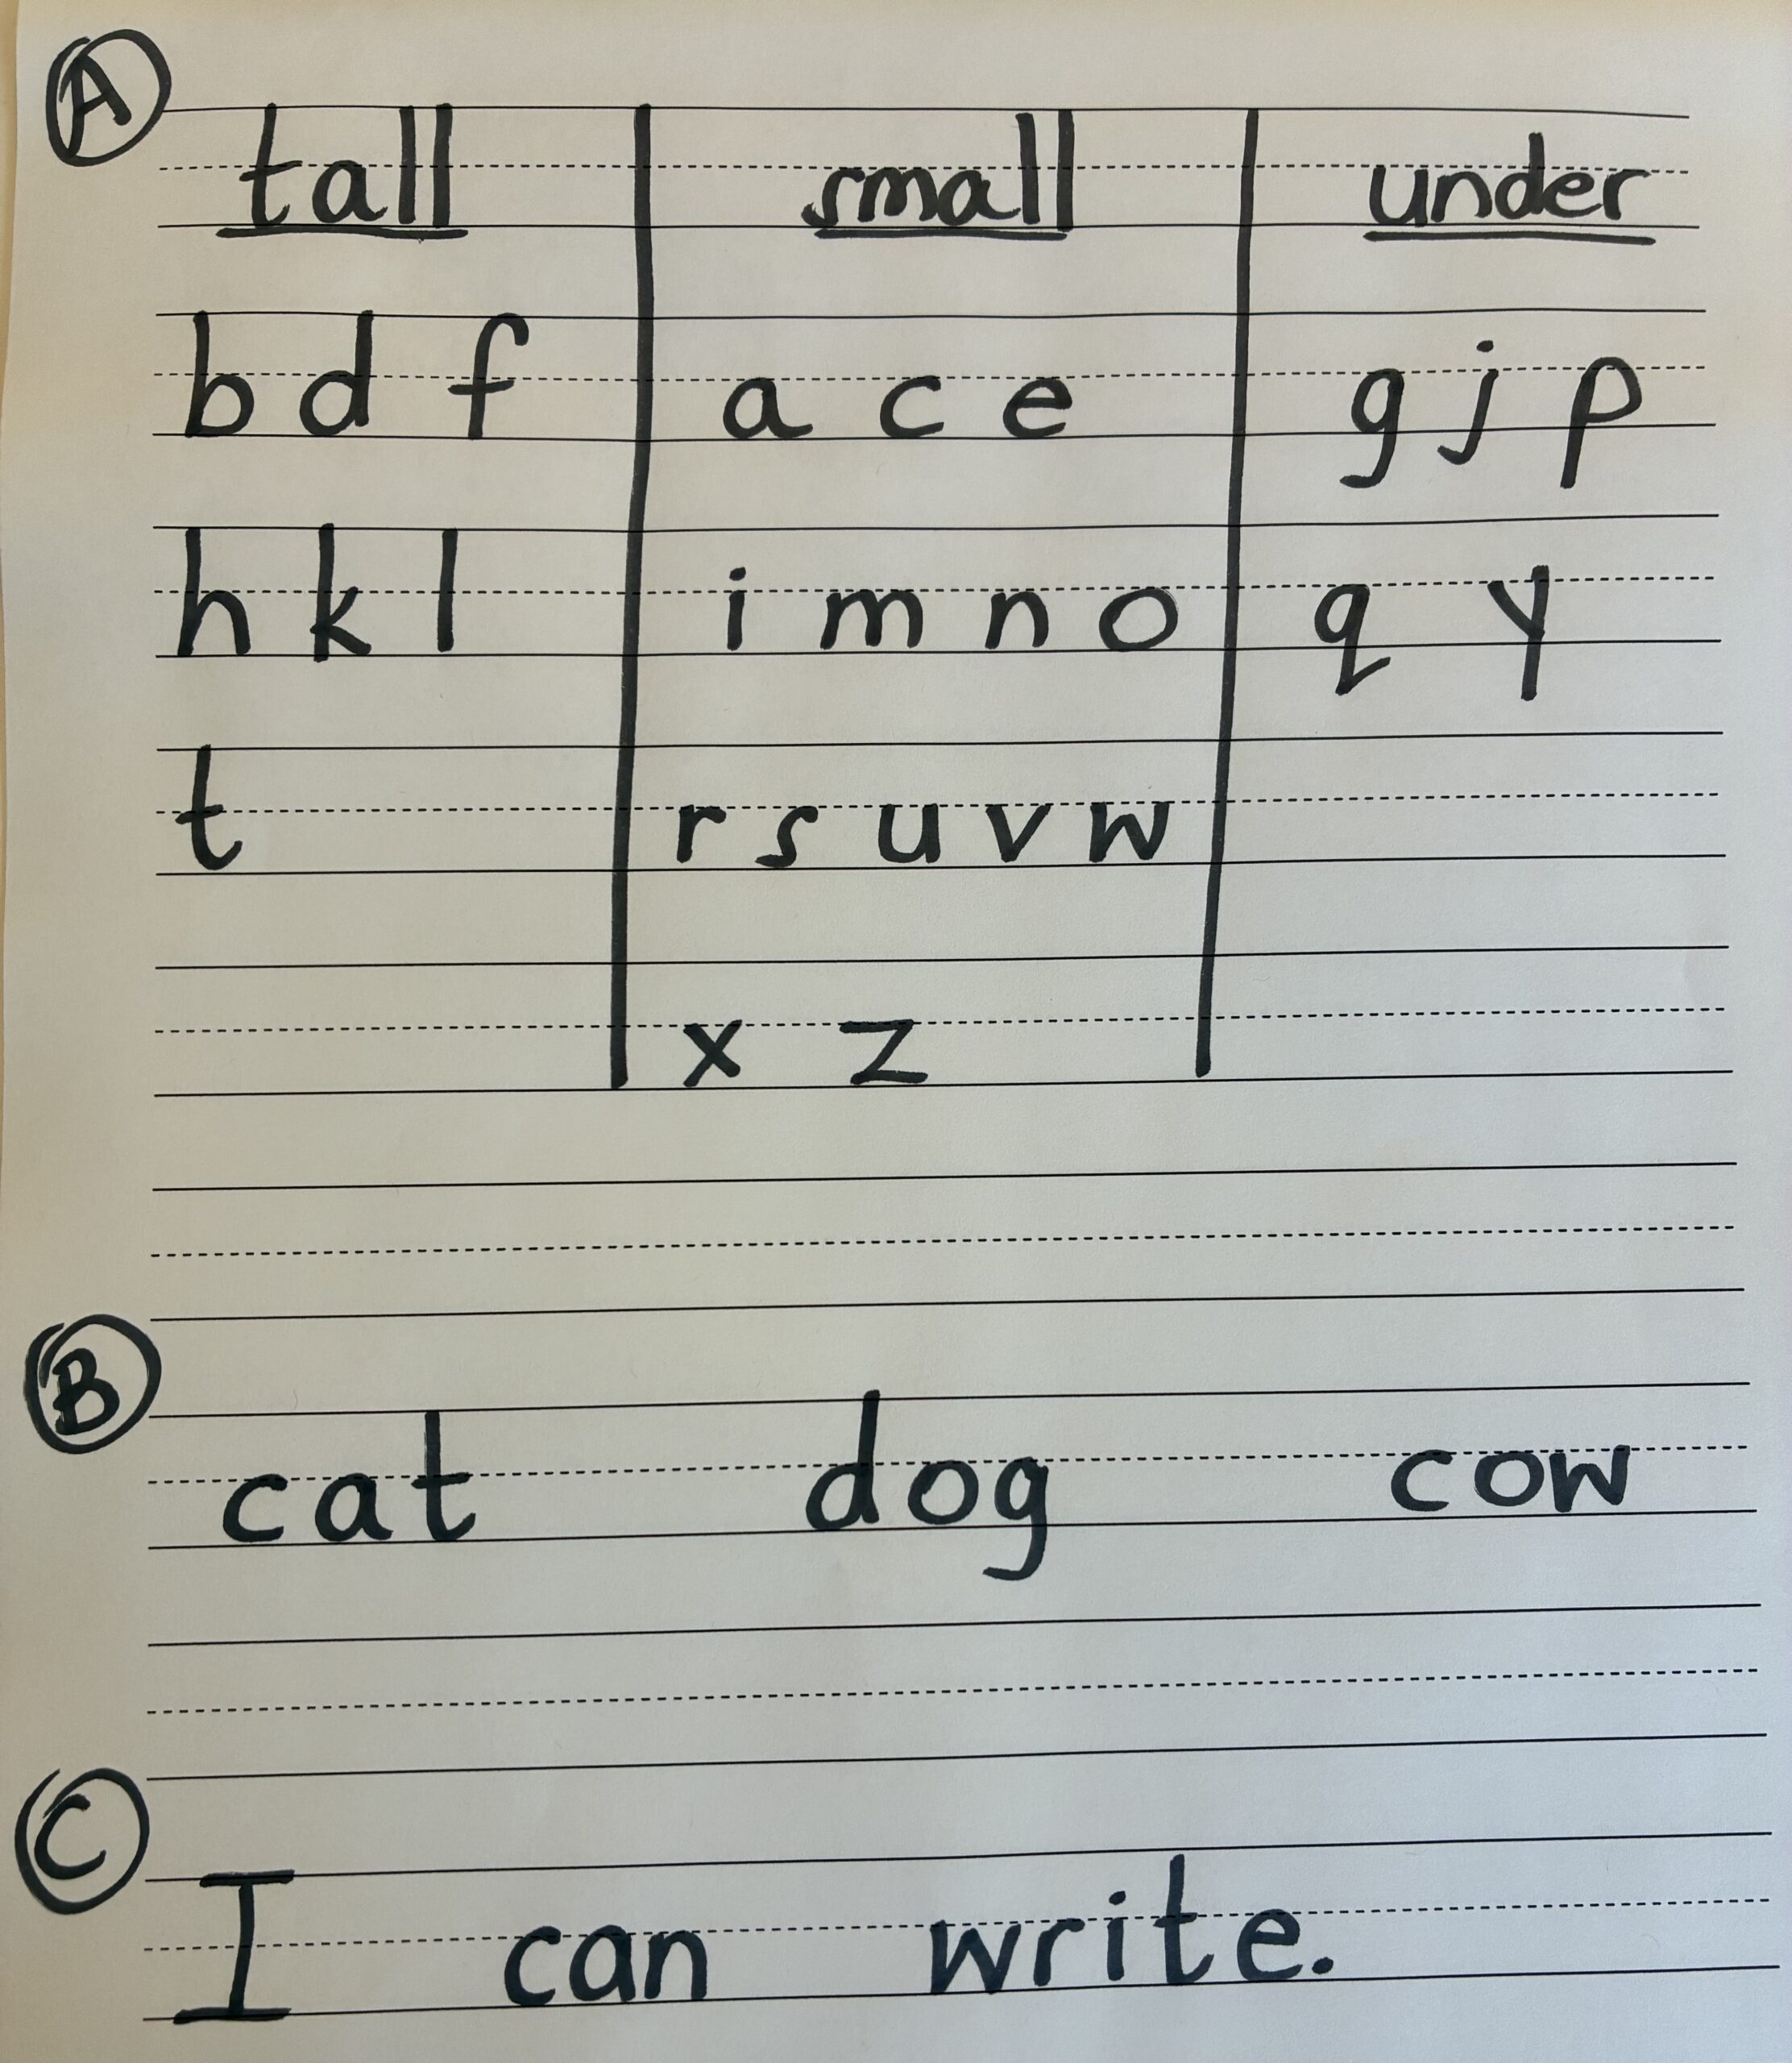
Using triple lined paper, make 3 columns: tall, small, and under. Start from lowercase letter “a” and go through the alphabet. Ask your child “In which column does this letter belong?” Have your child write each letter in the correct column.
Once this is easy for your child, have him or her write words and double check together that the letters are written correctly, according to each category. Continue on to sentences.

When mastered, move on to looseleaf paper, initially drawing a middle line in between the top and bottom lines. Then have your child write sentences with only an “imaginary” middle line.
Step 2: On the line
Have your child write a sentence.

Make sure none of the letters are “floating” (written above the bottom line) or “drowning” (under the bottom line). Go through the letters one by one, making sure all letters are aligned on the bottom line.
Step 3: Spacing
Within each word, the letters should be close together, nearly touching each other. However, within a sentence, the words should be spaced adequately apart.

When learning this skill, some children find it helpful to place 2 fingers after each word before starting to write the next word within a sentence, since this creates adequate spacing. However, the end goal is for your child to eyeball the sentence independently and make corrections as needed without using fingers as cues.
Tips:
- Introduce the rules one at a time. Practice several times a week until mastered and then move on to the next rule.
- Create a 3-step checklist for your child: sizing, on the line, spacing. Check the sentences over together and once mastered, have him check his own sentences independently.
- Make handwriting time a positive experience! Praise progress instead of criticizing mistakes.
The goal is for your child to feel confident and successful!


|