
The technique is called “Paint Pour” and anyone can do it!
Want to see more canvas crafts? See the how-to for the Initial Art project here. You can also see that post for tips on having a painting party without a big resulting mess! Read on for a more sophisticated art activity!
A paint pour project is an extremely fun and creative way to create a quick and impressive art project. You won’t know how the project will turn out until you pour and tilt your paint colors onto the canvas (That’s the fun part!). There are many ways to create the marbled swirly effect.
Below are steps to create what is known as a “dirty pour.”
We used special paint pour paints for this project (each kit from Michael’s will cover 3-4 8”x10” or 10”x10” canvases). Alternatively, we have provided steps to create your own fluid paints.

What you will need:
4 small plastic bowls or cups
10 oz. cup
Paint pour kit or fluid paints for paint pouring OR liquid acrylic paint, Elmer’s Glue-All, and distilled water
Disposable gloves
How to do it:
- Set up your area. Cover all surfaces with disposable plastic tablecloths or butcher block paper. Put on disposable gloves
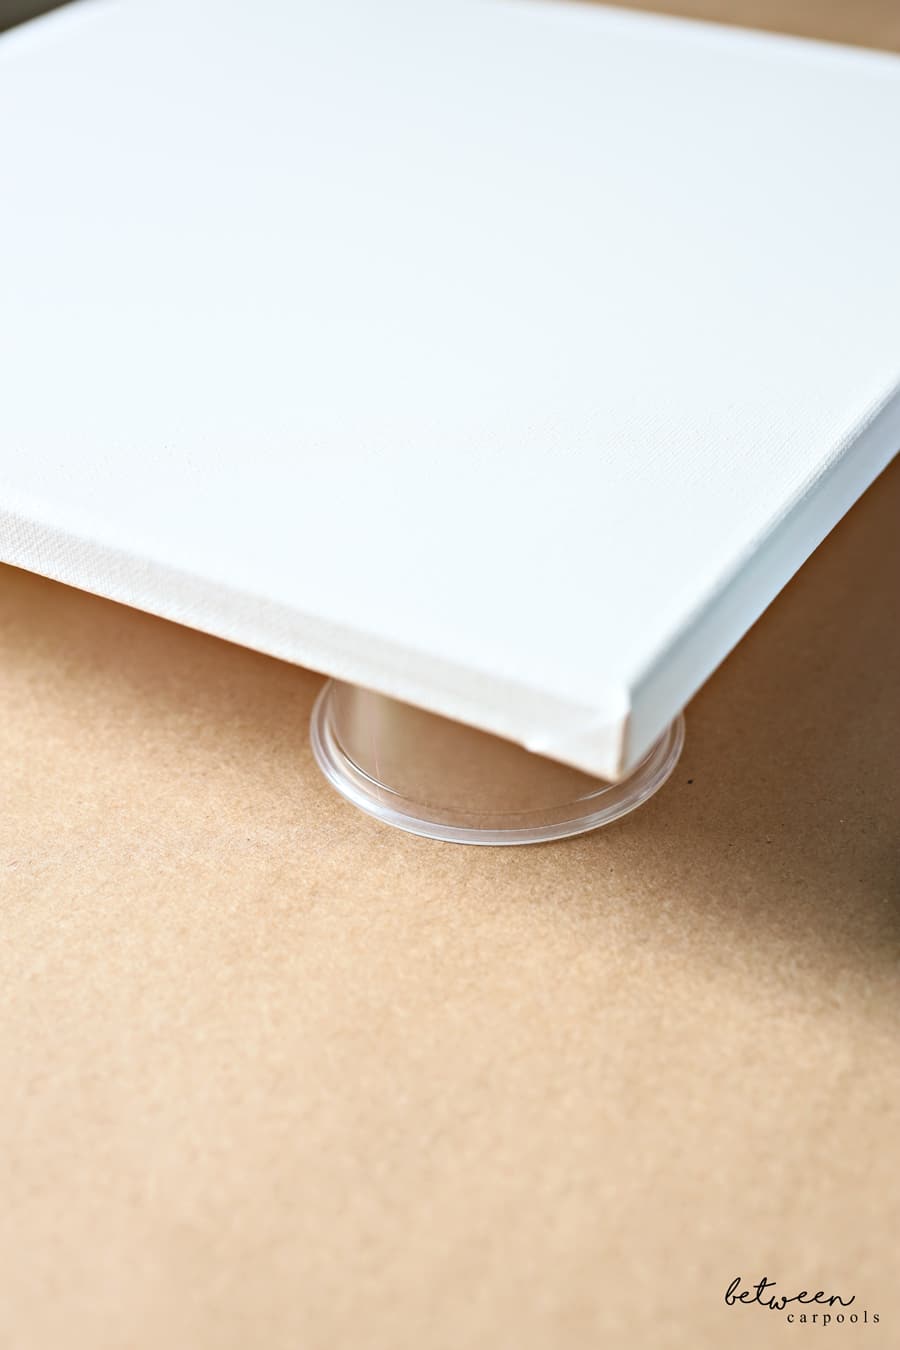
- Place canvas on 4 small overturned cups or bowls. If you will need to move the project, place the bowls in a pizza box or aluminum foil pan.
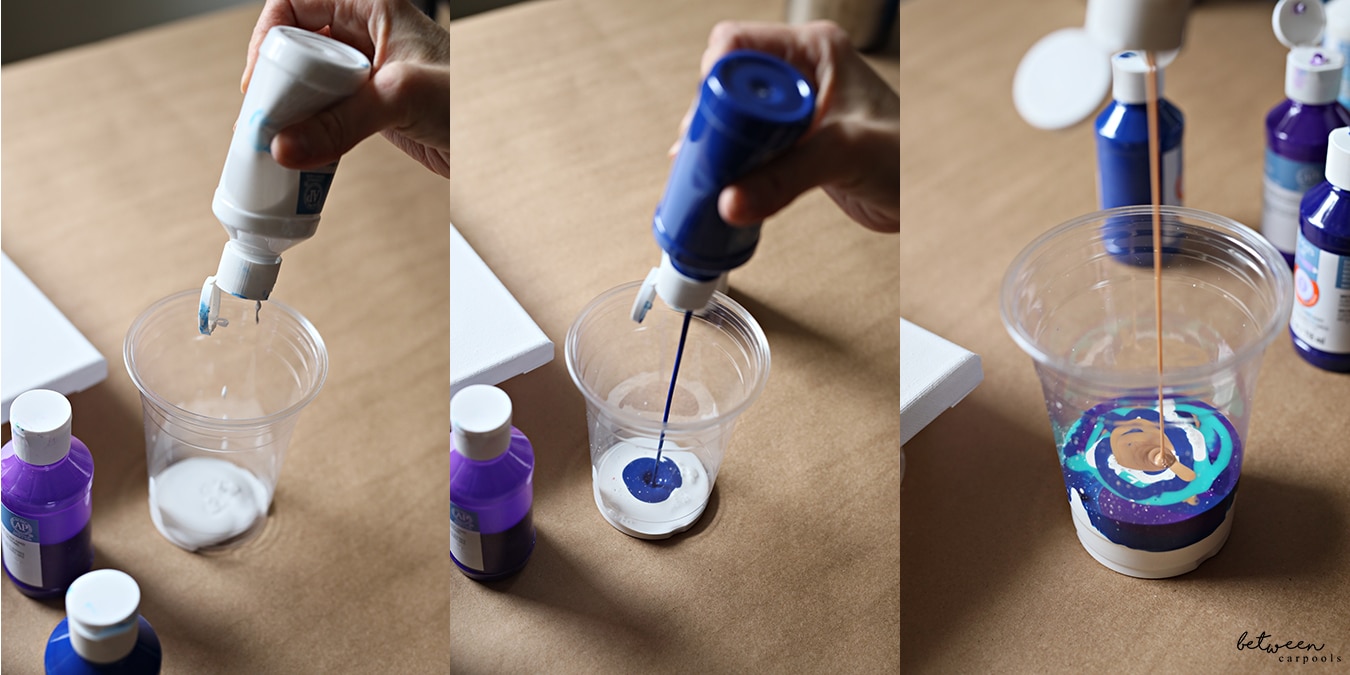
- Pour a small amount of paint into the large cup. I like to start with white. Add another color. Continue layering in more colors one on top of the other (you can repeat colors). Fill the cup 2/3 full.

- Start pouring the paint in the middle of the canvas; pour in slow concentric circles until the paint is all poured out. Lift the canvas carefully off the cups and then tilt the canvas to “stretch” the paint to all sides of the canvas. If the paint doesn’t reach all the corners you can squirt some white paint directly on the blank canvas and tilt the canvas to blend in with the white paint. When the entire canvas surface is covered place the canvas back on the 4 overturned cups or bowls. Do not touch the wet paint. Let dry for at least 24 hours.


Make your own fluid paint: for each color, mix 1 part liquid acrylic paint to 2 parts Elmer’s Glue-All and 1 part distilled water in a cup (disposable cups with covers so that you can store any extra fluid paint mixture.)


|